Welcome back! Time to talk about my tent, the CORE 10 person instant cabin tent with screen room. If you’ve been here on the journey so far, you know it’s been a time with this tent.
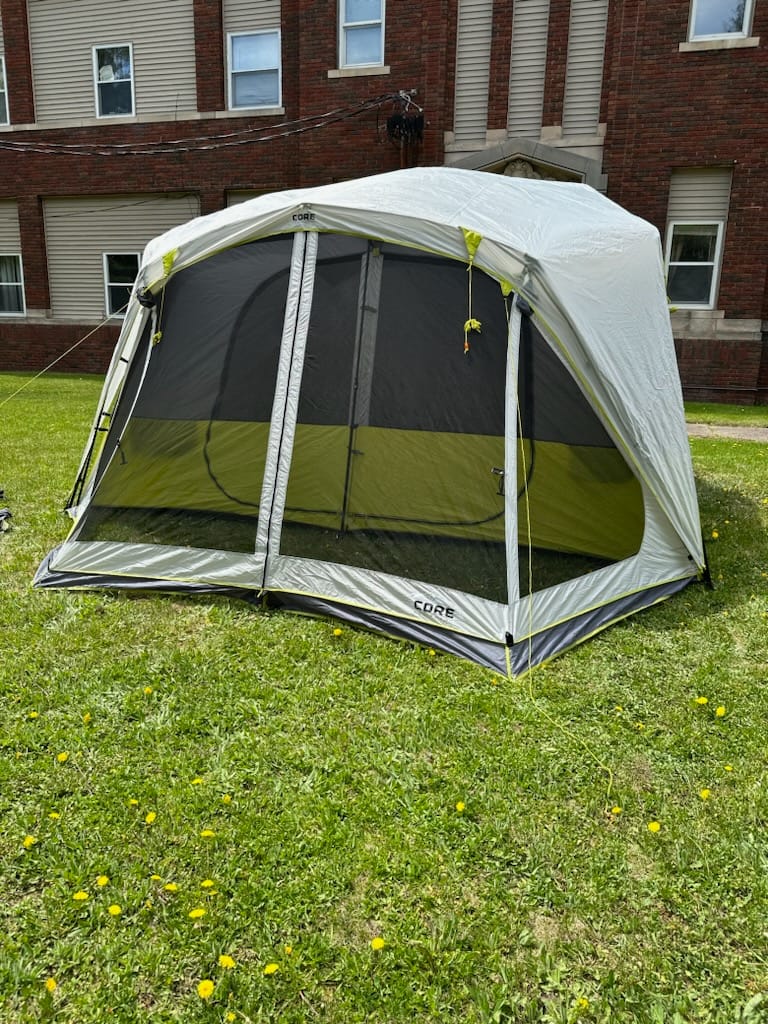
CORE 10 Person Instant Tent
I have slept in my share of tents in the past and I knew what I wanted when I started shopping. The requirements were pop up style (because I struggle with poles and almost break them every time) and tall enough so I can stand upright. This definitely hits both of those. In fact, this one can accommodate a person up to 7 feet tall…I overestimated my height in inches…
The floor size is 10×14 feet with a center height of 84 inches. Like the name suggests, it can hold 10 people if people sleep shoulder to shoulder. If you’re like me and don’t like that, it also can fit two queen sized air mattresses. The space can also be divided into two rooms if you want separate areas. I call it my camping studio apartment since I can literally fit everything inside when I’m solo.
The website claims it can be set up in two minutes. I didn’t have that experience when I was putting it up by myself, but could definitely see it if there were two people. That being said, it took under 10 minutes to get things up and together. Not bad at all.
Likes
- The pre-attached poles! It makes this so much easier and helps conserve energy. The tent basically lifts itself.
- A lot of ventilation, including several window, air intakes at the bottom, and the screen roof.
- Durable and waterproof. This thing has been through a few rainstorms and I never got wet inside.
- Fits in the bag, even if you don’t put it away perfectly.
- Designated spot for the extension cord that closes with Velcro to keep out bugs.
- Several hooks on the ceiling for the partition, lights, or whatever you need to hang (within reason).
- Comes in a few different colors. The green caught my eye the most, so that’s what I chose.
Dislikes
- Rain fly could extend further over the screen room portion. Everything inside gets wet when it rains unless it’s by the doors.
- The stakes that come with it are pretty dinky. They are the thin L-shaped ones and bend easily. I am glad that I got the tool kit because they have massive stakes that make getting through the rocky soil easier.
- The instructions included are small and hard to read. We ended up watching a video or two to make sure we were doing it right. The issue was one I walked about in my [blank] blog, where the pole got tangled up…it originally came that way. It was figure-out-able, but frustrating. Now I know what to do, it isn’t so bad.
- It is on the heavier side at 37 pounds, however, it isn’t too difficult to move, especially if you use my energy conservation tips!
Price
The current price of the tent itself is $330, but I added on the footprint ($45) and the tent kit ($60). I figured if I was going to do it, I was going to do it right. This can be a lot at once, but I wouldn’t regret spending the money. Especially if you’re going to put it to good use. They do have sales, which was why the gear was purchased when it was. If you want this gear, keep an eye on it and get it at a lower price. It is worth the original cost, but if you can save some money why not do it?
There are cheaper (and more expensive) options out there for tents and accessories, so you’ll have to find what works for you and your budget.
If you’d like to see something specific I use highlighted in next month’s post comment it below! You can find the majority of my gear here.
Be safe out there! REMEMBER YOUR MAPS AND PASSPORT STAMPS!! Seeyalaterbye <3
Also, if you feel called to help a sista out with her travels, check this out!